- Data limits: Valid url, with could contain any digits, strings or special characters.
- Data length: 2048 characters
- Data validation: The field cannot be empty
- Default value: Empty
Parameter Authentication (default) - Uses the parameter values and names, that will be authenticated by the website. When using this authentication method, the website owner / developer must authenticate the POST request fields.
-
HTTP Basic Authentication – Uses the Username and Password parameter values for authenticating with the Web Server. When using this authentication method, the Username and Password must be a valid local or domain user on the destination computer/webserver.
This option is recommended if Administrators would like to authenticate the uploading web requests with local or domain users.
NOTE: When using this authentication method, the Username and Password parameters are embedded in the request header and are not part of the POST request, therefore the parameter name for Username and Password is not editable.
-
OTP (One-Time-Password) Authentication – The OTP Authentication method will prompt the user to enter a one-time password, every time when printing a document. The HTTP Uploader will pass the provided password without validation. It is the responsibility of the destination webpage/web application to validate the OTP and proceed with the uploading or return an error message to the HTTP Uploader.
NOTE: The OTP Authentication is not available in Silent Mode.
No Authentication – This method will not use the Username and Password parameters and their values for the request, therefore the parameter value and name for Username and Password is not editable.
- Data limits: Any digits, strings or special characters.
- Data length: 256 characters
- Data validation: The fields are optional and can be left empty. If the Username or Password is not empty, then the appropriate Parameter name field must be filled out.
- Default value: empty
- Data limits: Any digits, strings or special characters.
- Data length: 127 characters
- Data validation: The fields are optional and can be left empty. If the Username or Password is not empty, then the appropriate Parameter name field must be filled out.
- Default value: empty
- Data type: string
- Data limits: Any digits, strings or special characters.
- Data length: 256 characters
- Data validation: The fields are optional and can be left empty. If the Username or Password is not empty, then the appropriate Parameter name field must be filled out.
- Default value: empty
- Data type: string
- Data limits: Any digits, strings or special characters.
- Data length: 256 characters
- Data validation: The appropriate parameter name field must be filled out, if the Username, or Password, or Custom Parameter is not empty.
- Default value: empty
- Date/Time of the uploading
- Success of Error code and message
- Username, Custom parameter value
- Uploaded Filename
- URL
Uploading to Web
The Black Ice Printer Drivers have a built-in feature to upload converted files instantly to a website using HTTPS/HTTP. This feature is available from version 14.76 in every Black Ice X1 Printer Driver.
NOTE: The HTTP upload feature requires .NET Framework 4.8 or higher!
In order to upload converted documents to a web server, one will need a webpage which receives and saves the uploaded documents to the web server. For example solutions, please refer to the Configuring Webpage (PHP) and Configuring Webpage (ASP.NET) pages.
The HTTP Upload feature sends the converted documents to the specified web address with POST requests, which is the most common solution to upload documents to a website.
One can enable the Upload document to Web feature in Control Panel > Printers and Devices > right click on the Black Ice Printer Driver > Printing Preferences > Filename Generation Tab > Enable Upload document to Web.

Click on the Edit Upload to Web settings button, to configure the uploading preference. The following window appears where one can configure the uploading preferences:
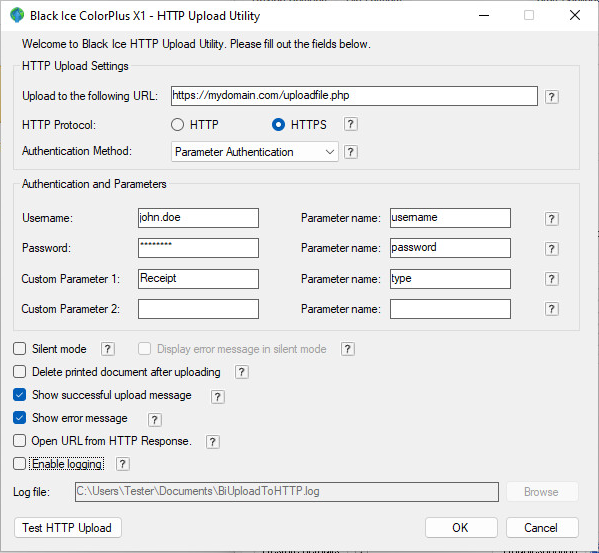
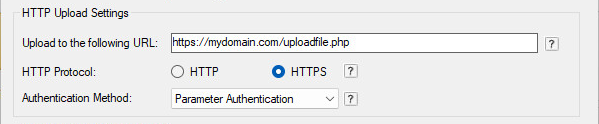
Upload to the following URL – This field must contain the web address where the POST request will be sent.
For example: https://www.mydomain.com/upload.php
This webpage must be able to handle POST requests with files, and then save the file to the server.
To specify which protocol the webpage is using (HTTP or HTTPS), type the protocol in front of the web address, (http://www.mydomain.com/upload.php or https://www.mydomain.com/upload.php) or select the appropriate radio button on the user interface.

Authentication Method – specifies the method of the authentication, when uploading documents to the web server.
Authentication and Parameters
This area allows one to specify parameters in the POST request. For example: to authenticate a user when uploading a document. All the listed parameters are optional.
Every parameter has a “Parameter Name” field, which specifies the name of the field in the POST request. The "Parameter Name" is an identifier, specifying how the website expects the parameter. For example if the Username is john.doe, and the website expects the username parameter as “Username”, and expects the password parameter as “Password”, then the configuration should look like the following:
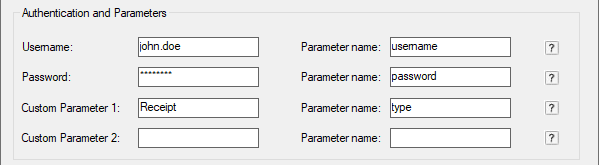
Username – Specifies the username, which will be sent to the webpage.
Password – Specifies the password for the username, which will be sent to the webpage.
Custom Parameter – Specifies a custom parameter, which could contain any additional information for the uploading, for example the computer name.
Parameter name – Specifies the name of each field, how the configured webpage will expect the parameters. Since most websites are using specific parameter names for uploading documents, there is no general solution for uploading documents which fits to every webpage.
Further HTTP Upload options:
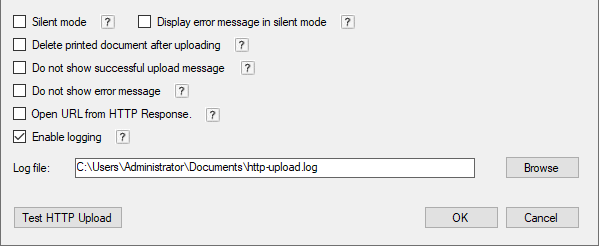
Silent mode – If this option is enabled, then the HTTP Uploader will upload the documents without any user interaction. This feature is useful if one would like to upload every converted document with the same parameters every time.
Display error message in silent mode – If this option is enabled, the HTTPS/HTTP Uploader will display a web developer defined error message for the user, even if the “Silent mode” is enabled. When using this option, user will be able to upload the documents without any user interaction in silently, however if any problem occurs, the users will be notified immediately with an error message. The Display error message in silent mode should not be used if the printing is executed from Windows Services for uploading files through HTTPS/HTTP.
Delete printed document after uploading – If this option is enabled, the HTTP Uploader will delete the converted document after it has been successfully uploaded.
Show successful upload message – If this option is enabled, the HTTP Uploader will display messages about successful document uploads.
Show error message – If this option is enabled, the HTTP Uploader will upload the document silently to the web server or will display an error message.
NOTE: If the logging is enabled, one can review the error messages in the specified log file.
Upload OCR Text – If this option is enabled, the Printer Driver will use OCR (Optical Character Recognition) to extract text from the printed document to a text (.txt) file. The generated text file will be uploaded alongside the printed document to the web server. Please note, that the OCR text will be an additional file in the Web request.
Open URL from HTTP/HTTPS Response – If this option is enabled, the printer driver parses the HTTP/HTTPS response and will open the URL using the default browser from the response text.
For example, when the HTTP/HTTPS response is the following, the Printer Driver will open the http://www.blackice.com in the browser.
600;http://www.blackice.com
Logging
Enable logging – If this option is enabled, the HTTP Uploader will log every uploading into the specified log file. The log file will contain the following information:
The default location of the log file is:
C:\ProgramData\Black Ice Software LLC\[Black Ice Printer Driver]\Logs\BiUploadToHTTP.log
Example of how the log looks like:
07/20/15 20:01:16,"Successfully uploaded","John","Custom123","document1.pdf","http://192.168.0.204/upload.php"
07/20/15 20:01:16,"Successfully uploaded","John","Custom123","document2.pdf","http://192.168.0.204/upload.php"
Example of how the log looks like when an error occurs:
07/20/15 20:01:16,"Error 605: The provided username is incorrect.","John","Custom123","document1.pdf", "http://192.168.0.204/upload.php"
Enable debug logging – Log request headers – If this option is enabled, the HTTP Uploader logs the request headers when the Custom Header/Token authentication method is used.
Example of how the log looks like when the debug logging is enabled:
10/22/2024 1:11:47 PM,,,### Custom Headers: ###
10/22/2024 1:11:47 PM,,,authorization: Bearer authentication-token-string
10/22/2024 1:11:47 PM,,,myvalue1: value1
10/22/2024 1:11:47 PM,,,myvalue2: value2
10/22/2024 1:11:47 PM,,,myvalue3: value3
10/22/2024 1:11:50 PM,,,Transfer-Encoding: chunked
10/22/2024 1:11:50 PM,,,Content-Type: text/html; charset=utf-8
10/22/2024 1:11:50 PM,,,Date: Tue, 22 Oct 2024 11:12:45 GMT
10/22/2024 1:11:50 PM,,,Server: Microsoft-IIS/10.0
10/22/2024 1:11:50 PM,,,X-Powered-By: ASP.NET
10/22/2024 1:11:50 PM,,,### Custom Headers Finished. ###
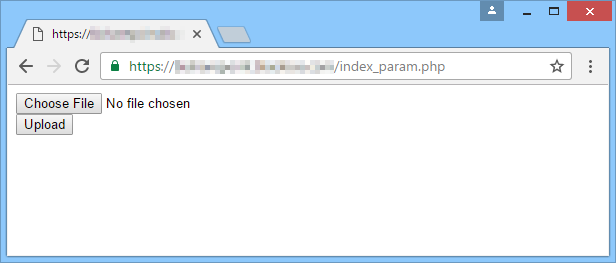
If the silent mode is not enabled, and the HTTP Upload settings are already configured, the following simplified window will appear for every HTTP upload:
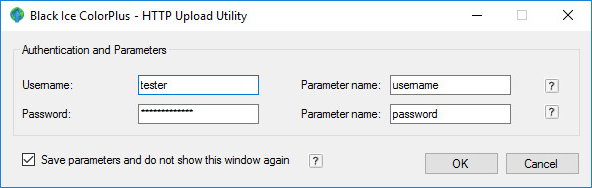
On this window, one can enter the username and password to validate the access to the webpage, and upload the document.
Save parameters and do not show this window again - If this option is enabled, the HTTP Uploader will save the entered parameters and values, and will not ask for the parameters again when printing.
The Password is saved in an encrypted format in the registry.
Click on the OK button to start uploading the document. If the uploading is successful, the following window will appear (if silent mode is not enabled).